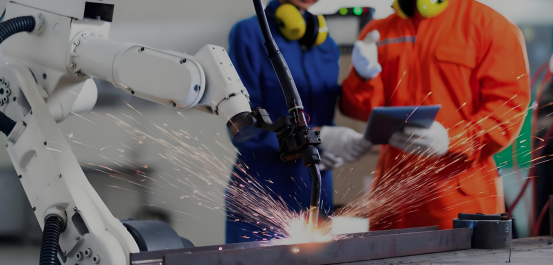
Processing cast iron requires a specific approach due to its unique properties. It’s not a single material but a family of alloys (like gray, ductile, and compacted graphite iron) known for high carbon content, good compressive strength, but also brittleness and abrasiveness. The primary challenges are managing its abrasive nature, preventing cracking and chipping, and controlling graphite dust.
Here are the critical precautions for major processing steps:
- Machining (Turning, Milling, Drilling)
The core goal in machining is to combat tool wear and achieve a clean finish without damaging the part.
- Tool Selection: Always use carbide-tipped tools for their wear resistance. For high-volume production, polycrystalline diamond (PCD) tools are excellent for combating abrasion. Ensure tools are sharp with a positive rake angle to reduce cutting forces, which helps prevent the part from chipping.
- Rigidity is Paramount: Any vibration or chatter from a loose setup will likely cause the brittle iron to fracture at the edges. The machine, workpiece, and tool holder must be extremely rigid to ensure a smooth cut.
- Speeds and Feeds: Generally, lower cutting speeds are used to control abrasive wear on the tool. However, a higher feed rate can sometimes be beneficial to get the tool past the hard, abrasive “casting skin” quickly and into the more uniform base metal below.
- The Coolant Debate: A major precaution is the decision to use coolant. Cast iron is most often machined dry. This is because coolant can mix with the fine graphite dust produced during machining to create a sticky, abrasive slurry that is highly damaging to machine tools, guideways, and ball screws. Furthermore, the rapid heating and cooling can cause thermal shock and micro-cracking in carbide tool tips.
- When to Use Coolant: Coolant is sometimes used in finishing operations for critical tolerals and surface finish, or when machining hard alloyed irons that generate significant heat. If used, a flood coolant system is preferred over mist to help wash away dust.
- Dust Control: This is a non-negotiable safety and equipment precaution. Graphite dust is abrasive and can be harmful if inhaled. Use integrated vacuum systems or dust collectors at the source. Operators should wear appropriate respiratory protection if dust isn’t fully contained.
- Grinding
Grinding is used for finishing and deburring.
- Abrasive Wheel Selection: Use aluminum oxide or silicon carbide wheels. The wheel must be kept sharp and open-grained to prevent “loading,” where iron dust clogs the spaces between abrasive grains, rendering the wheel ineffective and causing heat buildup.
- Avoid Heat Buildup: Apply steady, even pressure and keep the part moving. Grinding in one spot generates intense local heat that can cause “checking”—a network of small thermal cracks on the surface.
- Use Coolant: Unlike in many machining operations, coolant is highly recommended in grinding to control heat, suppress dust, and improve surface finish.
- Welding and Joining
Warning: Welding cast iron is difficult and should only be attempted by experienced professionals, usually for repair, not fabrication.
- Thorough Preheating: This is the most critical step. Preheating the entire casting to between 500°F and 1200°F (260°C – 650°C) slows the cooling rate of the weld. This prevents the formation of extremely hard, brittle martensite in the heat-affected zone, which is the primary cause of cracking.
- Slow Controlled Cooling: After welding, the part must be cooled very slowly, often by burying it in an insulating material like lime or vermiculite. This “post-heating” process relieves built-up stresses.
- Correct Filler Metal: Use specialized nickel-based or nickel-iron electrodes. These materials are more ductile and compatible with the high carbon content of the base metal, allowing the weld to absorb stresses without cracking.
- Technique: Use a low current setting and deposit small, stringer beads. Peening (lightly hammering) each bead while it is still warm helps to relieve stress. Avoid large weave beads that put excessive heat into the part.
- Heat Treatment
- Slow and Even Heating: Castings have complex shapes with varying thicknesses. Heating them too quickly creates thermal stresses that can cause warping or cracking. A slow, controlled heating rate is essential.
- Avoid Severe Quenching: Never quench most cast irons, especially gray iron, in water or fast oil. The thermal shock will almost certainly cause cracking. Quenching is typically only performed on specialized grades like Austempered Ductile Iron (ADI) using controlled processes.
- Stress Relieving: This is a very common treatment. Heating the casting to 1000-1150°F (540-620°C) and holding it before slow cooling relieves internal stresses from the casting process and prior machining, ensuring dimensional stability in the final product.
- General Handling and Storage
- It’s Brittle: Never drop cast iron products or subject them to impact. Avoid lifting them by applying force to thin sections or protrusions, as they are strong in compression but weak in tension and can snap.
- Proper Support: Store castings on flat, level surfaces. Avoid storing them in a way that causes them to bend under their own weight over time, as this can induce stress and lead to cracking.
Final Summary: Always identify the specific type of cast iron you are working with (e.g., Class 40 Gray Iron, 65-45-12 Ductile Iron). The exact precautions will vary. When in doubt, consult the material specification data sheet and tooling manufacturer’s recommendations. The key is to respect the material’s brittleness and abrasiveness at every step.

